 Get AI Photo Editor
How can I edit a specific area of a photo using AI?
Edit one part of a photo with AI by naming the area in your prompt. See a GetAIPhotoEditor sweater-color case on GPT Image 2.6 Flare—no mask required.
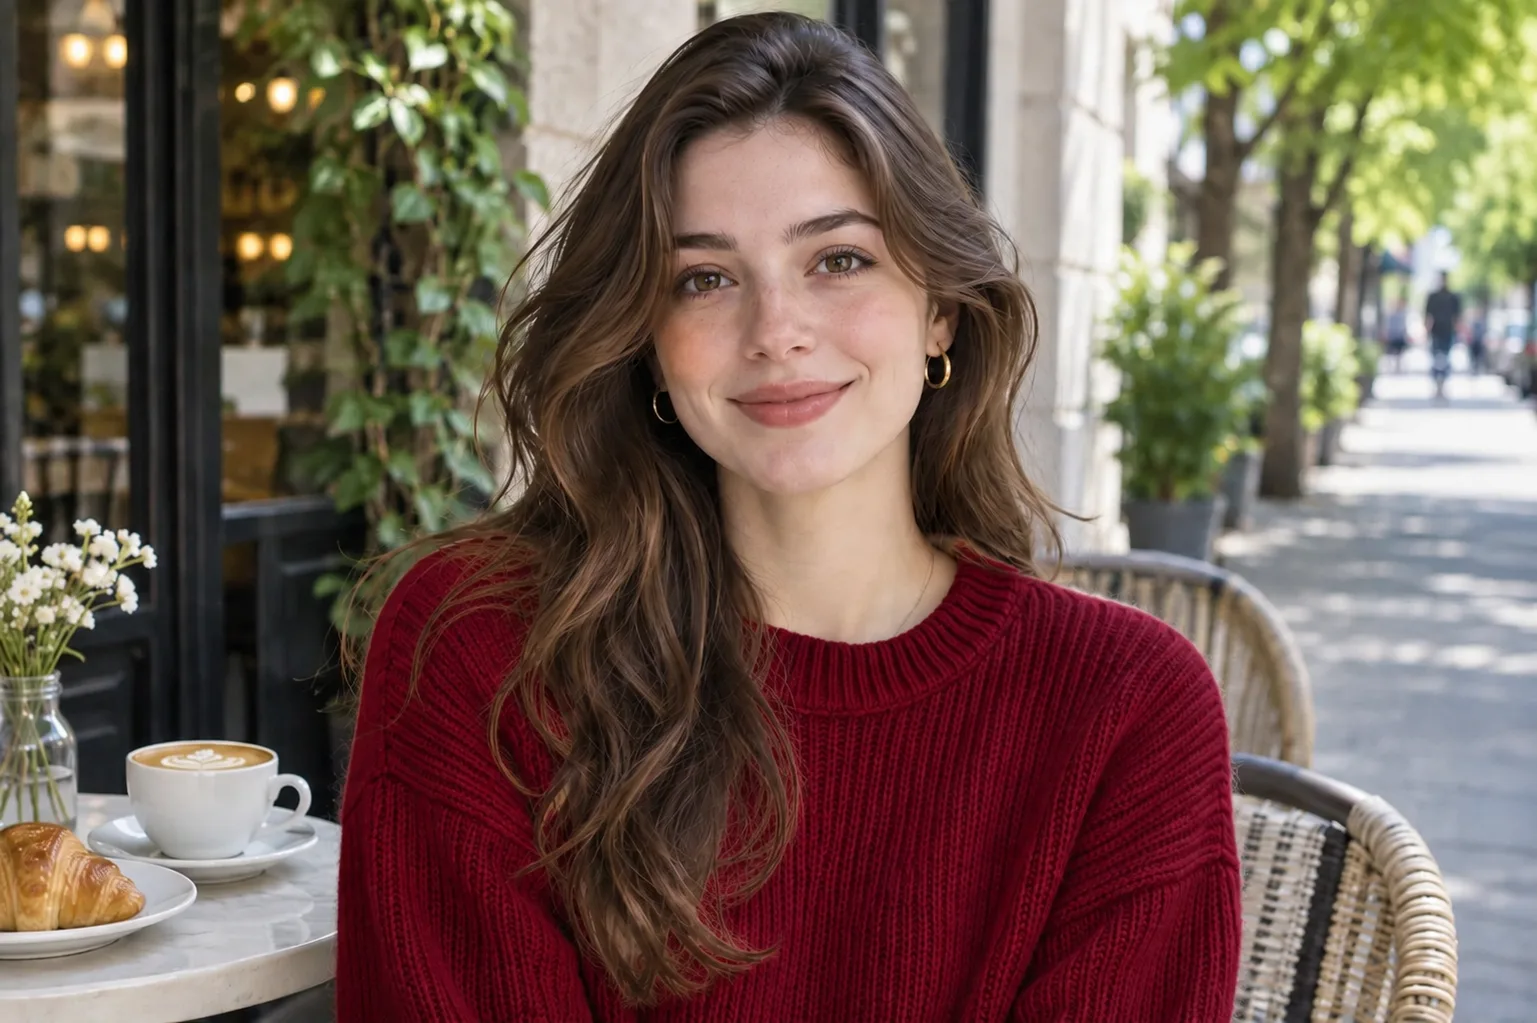
You edit a specific area of a photo with AI by naming that area in plain language, saying what should change there, and locking everything else. On GetAIPhotoEditor you upload the photo, write that instruction, pick a quality, generate, then inspect pixels outside the target before you download.
Area edit is not always a brush
Many tools answer this question with a mask: paint the region, then inpaint. That works when the product ships a brush. GetAIPhotoEditor’s live editor does not offer a precision-mask UI today. The shipped path is prompt localization: you tell the model which object or region to touch and what must stay unchanged.
The underlying model is GPT Image 2.6 Flare (the screen says “GPT Image 2.6”). There is no Flare versus Sunburst switch and no complexity control in the product. Quality is the fidelity dial you choose. For API-level Flare, Sunburst, and complexity, see What Is ChatGPT Images 2.6?.
Steps on GetAIPhotoEditor
- Upload a JPG, PNG, or WebP up to 10 MB.
- Write a localized prompt — name the region, the new look, and the parts that must not move.
- Pick a quality — Low 6 credits, Medium 10 (default), High 13, Extra high 22, Max 50.
- Generate, then zoom the face, edges, jewelry, and background—not only the edited area.
- Download when the result is good enough, or tighten the prompt and run again.
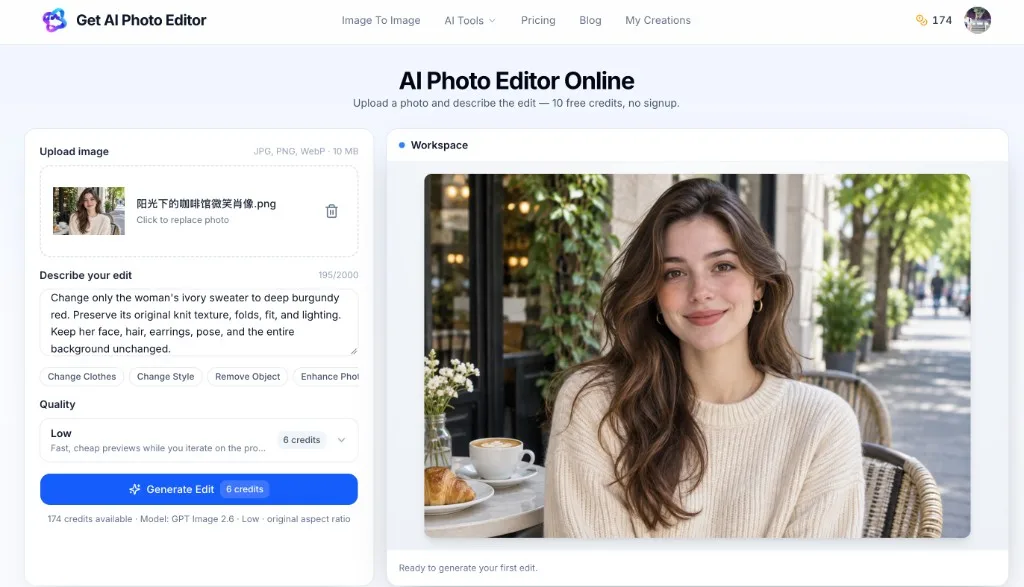
The left panel holds the upload, prompt, quality, and generate button. The workspace shows the source photo. Model label is GPT Image 2.6; quality is the only fidelity control on screen.
Open the AI photo editor when you are ready to try it.
Case study: change only the sweater color
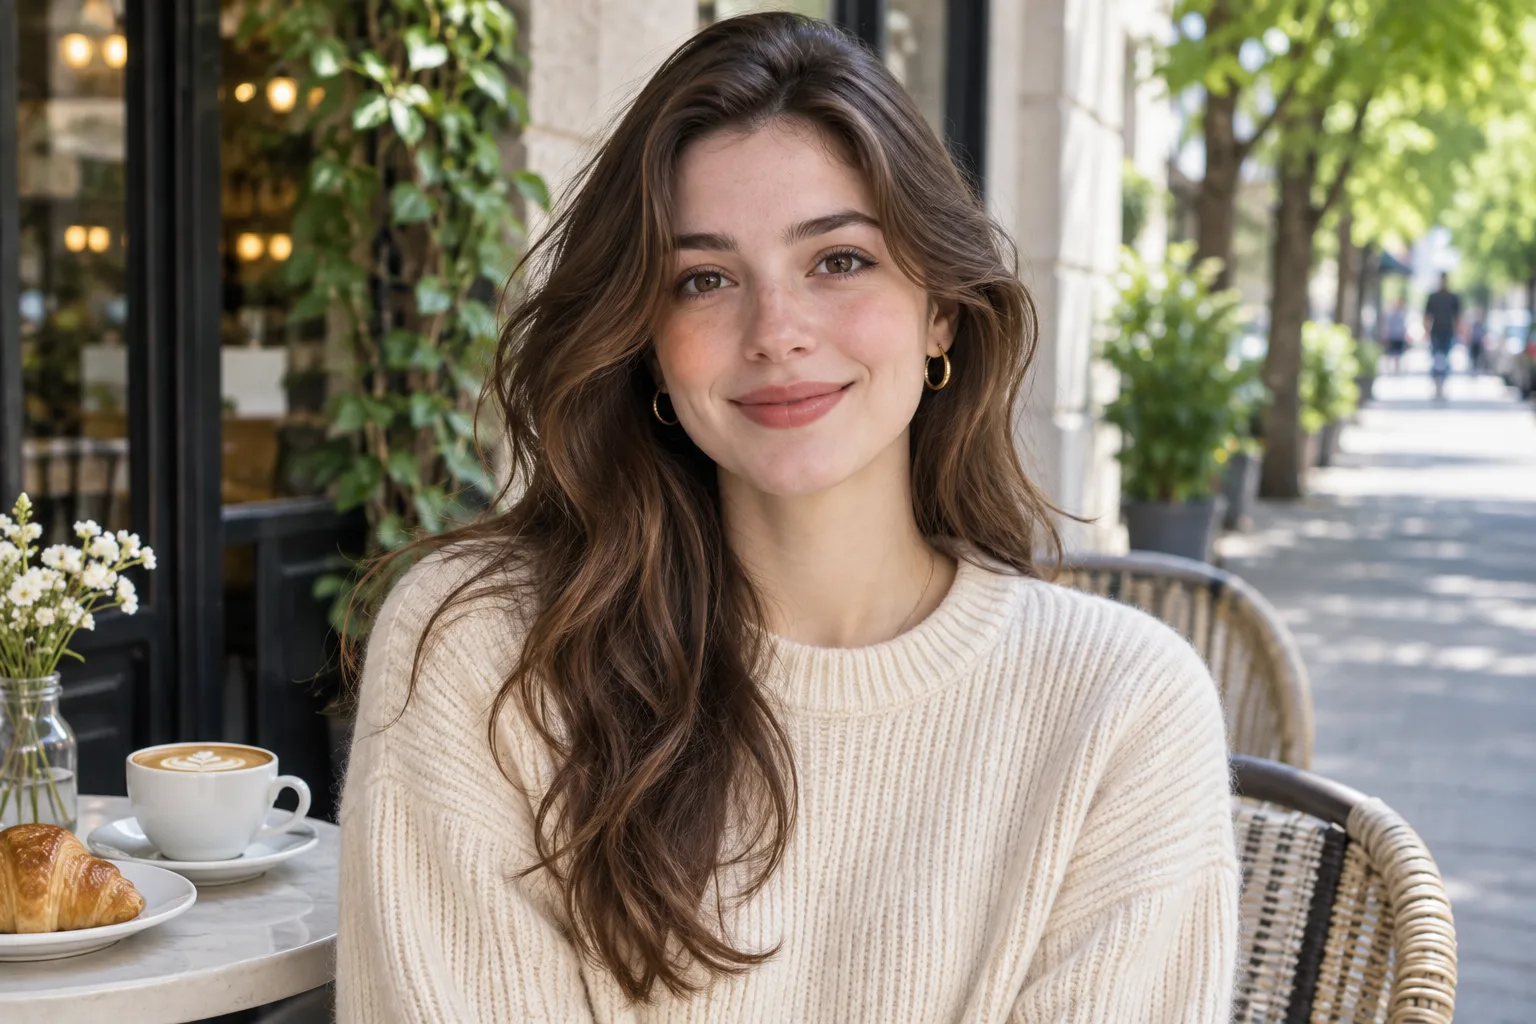
We tested a café portrait with an ivory knit sweater. The goal was a deep burgundy sweater while keeping the person, pose, table, and street the same.
Prompt used:
Change only the woman's ivory sweater to deep burgundy red. Preserve its original knit texture, folds, fit, and lighting. Keep her face, hair, earrings, pose, and the entire background unchanged.
Before
After (GPT Image 2.6 Flare on GetAIPhotoEditor)
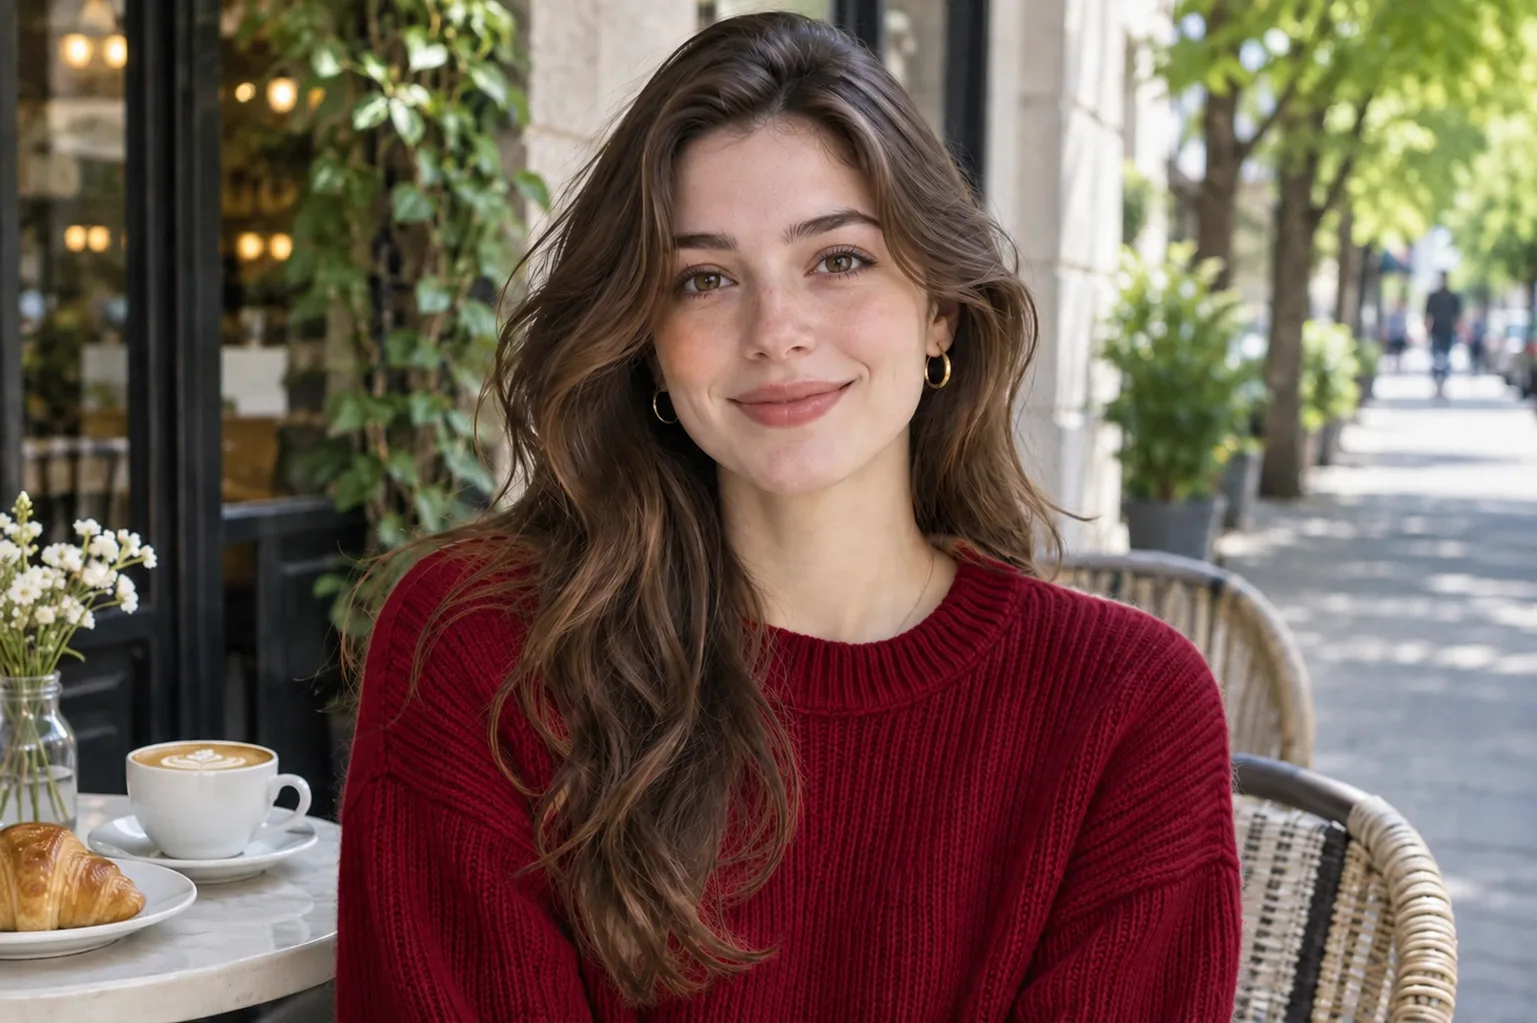
What held up: the sweater color landed in the right place. Face, hair, earrings, pose, coffee, croissant, and background stayed largely recognizable.
What still drifted: some non-target detail shifted anyway—knit micro-texture, soft edges, or tiny scene bits can move even when the prompt says “only.” Treat language localization as strong guidance, not a hard pixel lock. Always compare the full frame to the original.
Prompt pattern for local edits
Use three clauses in one instruction:
- Change only X — name the object or region.
- Preserve X’s material — texture, folds, fit, lighting, or material.
- Keep Y unchanged — face, logo, product shape, pose, and the rest of the frame.
Examples you can adapt:
- Remove only the passerby behind the subject. Reconstruct the background naturally. Keep the subject’s face, clothing, and pose unchanged.
- Replace only the wall behind the product with a soft studio gray. Keep the product shape, label, and reflections unchanged.
- Change only the handbag from black leather to cognac brown. Preserve the stitching, hardware, and lighting. Keep the model and background unchanged.
For a broader upload–prompt–download loop, see How to Edit Photos with AI. For lettering already baked into a photo, use the photo text editor and quote the new words exactly.
What to check after you generate
- Face identity and expression
- Hair edges against the background
- Earrings, logos, and small accessories
- Background bokeh and table objects
- Material continuity on the edited region (knit, leather, paint)
If something that should have stayed still has moved, rewrite the “keep unchanged” list and generate again. Raising quality can improve detail; it does not guarantee a stricter region lock.
Limits of the current editor
- No public brush or mask for “paint this area only”
- No Flare / Sunburst model picker
- No complexity setting
- Quality (low → max) is the control you see, with credit costs above
- Generative edits can still alter pixels outside the named region
New visitors get trial credits; medium edits use 10 credits by default. See pricing for packs.
FAQ
Do I need a mask to edit one area?
Not on GetAIPhotoEditor today. Name the area in the prompt and state what must stay. Mask/inpaint UIs on other products are a different workflow.
Which model does GetAIPhotoEditor use for this?
GPT Image 2.6 Flare on the edit path. The UI label is “GPT Image 2.6.” It does not expose Sunburst or complexity.
Does higher quality lock the region better?
Not reliably. Higher quality spends more credits for finer detail. Region control still comes from a clear “change only / keep unchanged” prompt and from reviewing the full result.
Can I edit text in one part of the photo?
Yes—describe the lettering change and what layout must stay, or use the dedicated photo text editor and put the new words in quotation marks.
Will the rest of the photo stay pixel-identical?
No. Expect small unintended shifts. Compare before and after outside the target every time.
Try it
Upload a photo in the AI photo editor, write a three-clause local prompt, generate once, and inspect the whole frame—not only the part you meant to change.